Eaglercraft Skins Guide: Add Custom Skins Safely
A practical browser-gaming guide for choosing 64x64 skins, testing custom skin files, avoiding risky downloads, and understanding where skins fit beside texture packs, mods, and profile settings.


Table of Contents
What Eaglercraft Skins Actually Change
Eaglercraft skins change the appearance of your player character. They do not change block textures, server mechanics, world files, or client code. That makes the intent narrower than Eaglercraft texture packs and much safer than mod or client downloads when you keep the file to a normal skin image.
Most skin searches are really about three questions: where to find a Minecraft-style skin, whether the file works in a browser client, and how to avoid fake download buttons. The answer depends on the client build you are using, because some Eaglercraft versions expose profile or skin settings while others rely on server-side account systems.
This deserves its own guide because the existing texture-pack page covers world visuals, the mods page covers code-level changes, and the download page covers risky installers. A skin is personal character customization, so the safest workflow is smaller: pick one image, import it only where the client supports it, and test before using it on multiplayer servers.
A skin should be reversible and personal. If a download changes your browser, asks for a launcher, or promises gameplay advantages, it is no longer just a skin.
| Search intent | What it usually means | Best action |
|---|---|---|
| Eaglercraft skins | Player appearance PNG or profile skin | Use this guide |
| Eaglercraft texture packs | Block, item, GUI, and world visuals | Use the texture-pack guide |
| Eaglercraft mods | Client code or loader behavior | Use the mods guide |
| Eaglercraft download | HTML, ZIP, APK, EXE, or mirror safety | Use the download safety guide |
How to Check Skin File Compatibility
For Minecraft Java-style skins, the practical default is a PNG skin file. A 64x64 layout is the modern standard and is the safest first choice for Eaglercraft 1.8.8 or 1.12.2 clients that support custom skins. Some older 64x32 classic layouts may appear in skin libraries, but they are less predictable in browser clients.
Look for sources that let you preview the skin and download the actual image file. A trustworthy skin file should be small, easy to inspect, and not wrapped inside a native installer. If a site hides the image behind pop-ups, notification prompts, shortened links, or unrelated files, skip it and choose another source.
Also separate personal skins from server identity. On some multiplayer servers, the skin displayed to others may depend on the server account system, username handling, or profile plugin. If your skin works locally but not online, the server may be overriding it rather than the file being broken.
| Check | Good sign | Risk sign |
|---|---|---|
| File type | PNG image file | EXE, APK, extension, or ZIP with unknown contents |
| Dimensions | 64x64 skin layout | Random image size or poster artwork |
| Source | Preview, creator info, direct image download | Only a large download button or login gate |
| Use case | Profile or local skin setting | Claims to unlock gameplay or bypass servers |
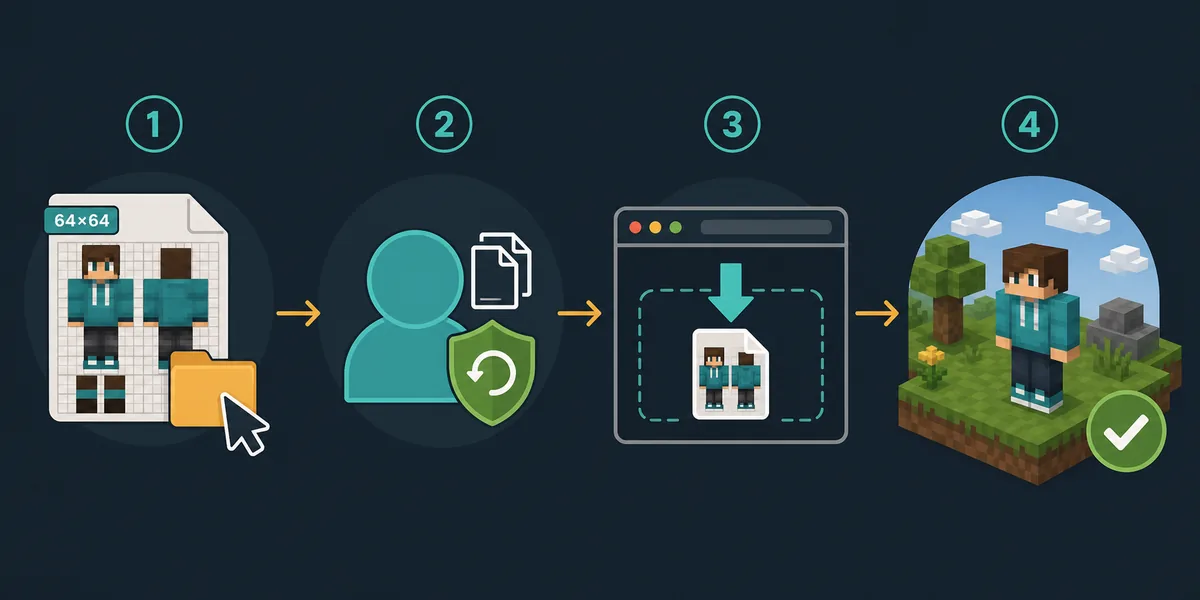
Safe Import Flow for Custom Skins
The exact button name changes by Eaglercraft build. Some clients use a profile menu, some use a skin or cape screen, and some hosted builds disable local skin changes. If you cannot find a skin option, do not install a separate program to force it. Use a client build or server profile system that clearly supports custom skins.
Import only one skin at a time. Keep a copy of the original file, test in a disposable singleplayer world or empty server lobby, and check the front, back, arms, and head layers. A skin that looks fine in a preview can still map oddly if it uses the wrong layout or model type.
If the skin matters for multiplayer, test it with a friend or alternate browser profile. Some servers cache skins, so changes can take time. Avoid repeatedly clearing all site data because browser storage may also contain local worlds, settings, and other Eaglercraft saves.
The safest flow is one skin, one test session, and no extra installers.
- Download or create one 64x64 PNG skin from a trustworthy source.
- Open the profile, skin, or account menu in a client that supports skin changes.
- Import or select the PNG without renaming it into an executable or archive.
- Test the skin locally and check front, back, head, and arm layers.
- Only use it on multiplayer after confirming the server allows and displays custom skins.
Download Safety: What to Avoid When Searching for Skins
Similarweb and Semrush both show meaningful search demand around Eaglercraft skins, but search demand also attracts thin download pages. Treat skin downloads conservatively. A skin should normally be a PNG image. It should not require a desktop launcher, Android APK, browser extension, survey, password, or notification permission.
Be especially careful with misspelled pages, mirrored files, and bundles that claim to include skins, capes, clients, and performance boosts together. That is no longer a skin file; it is a software download decision. If you are unsure, use the download safety guide before touching the file.
For younger players and school Chromebook users, the safest path is to use a well-known Minecraft skin library only for previewing and downloading image files, or to create a simple skin in a browser editor and save the PNG. Do not sign into unknown sites with school, Microsoft, Discord, or Google accounts just to get a skin.
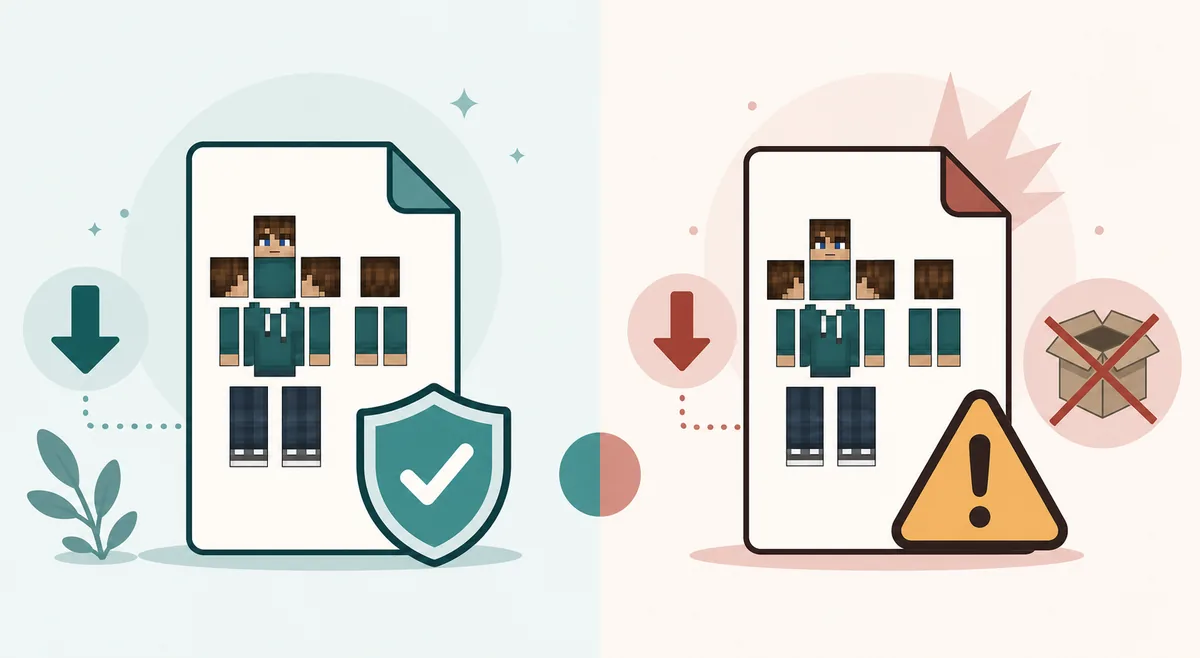
A safe skin file is boring: a small PNG with a clear preview. Anything more complicated deserves extra skepticism.
Better choice
Direct PNG skin download, visible preview, clear 64x64 layout, no account required.
Riskier choice
Installer bundles, APK or EXE files, browser extensions, surveys, shortened links, or vague mirror pages.
For multiplayer
Check whether the server displays custom skins or uses its own account/profile system.
For privacy
Avoid uploading account credentials or personal photos to unknown skin sites.
Common Skin Problems and First Fixes
If the skin does not appear, first confirm that your client build supports custom skins. A missing menu is not fixed by downloading a random skin installer. If the menu exists but the image fails, check the file extension, dimensions, and whether the PNG was downloaded correctly rather than saved as a web page.
If the skin appears distorted, the layout or model type may not match the client. Try a simple 64x64 Java skin before testing slim-arm variants, capes, or layered edits. If only multiplayer is wrong, the server may be caching the old skin or replacing player skins based on its own login system.
If browser performance changes after a skin import, the skin itself is rarely the main cause because it is a small image. More likely, a suspicious page changed settings, added an extension, or pushed a separate download. Remove the suspicious add-on or file and return to a known client.
| Problem | Likely cause | First fix |
|---|---|---|
| No skin menu | Client build does not support local skins | Use a build or server profile that documents skin support |
| Skin file rejected | Wrong file type or damaged PNG | Download the direct PNG again |
| Skin looks distorted | Wrong layout or model variant | Try a basic 64x64 Java skin |
| Multiplayer does not update | Server cache or profile system | Wait, relog, or check server account settings |
When Skins Are Worth Changing
Skins are worth changing when you want a recognizable player identity, a friend group theme, a cleaner look for videos, or a character style that matches your build. They are a lightweight customization layer, so they are a good first experiment before moving into texture packs or mods.
They are less useful when your real goal is higher FPS, better block visibility, multiplayer access, or new gameplay features. Use a low-resolution texture pack for visual readability, the server guide for connection problems, and the mods guide for client behavior changes. Keeping the boundary clear prevents risky downloads.
The best skin workflow is simple enough to repeat: choose a direct PNG, import it in a supported client, test it once, and keep playing. If a page makes the process feel like installing software, it is solving the wrong problem.
Use skins for identity and style, not for performance claims, server bypasses, or gameplay changes.
Need block visuals?
Texture packs change blocks, items, GUI, and readability rather than player identity.
Texture Pack GuideUnsure about a file?
Use the download guide before trusting APK, EXE, extension, or mirror-style pages.
Download SafetyChanging client behavior?
Mods and loaders are a different risk category from a simple skin PNG.
Mods GuideFrequently Asked Questions
References and Further Reading
- Minecraft Help - custom skins in Java Edition - Official context for Java Edition custom skin expectations
- Minecraft Wiki - Skin - General skin layout and player appearance reference
- Our Eaglercraft Download Safety Guide - How to evaluate risky files and mirrors
About the Author
Sophie Hartwell
Sophie writes practical browser-gaming guides focused on Eaglercraft versions, safe web play, multiplayer setup, and customization decisions. This guide keeps skin files separate from texture packs, mods, and unsafe download bundles.
Last reviewed: July 2026 - Focus: Eaglercraft skin compatibility and safe browser customization
Keep Skin Changes Small and Reversible
Start with a direct 64x64 PNG, test it in a supported client, and use other guides when the problem is texture packs or risky downloads.